August 5, 2009

Fat-free & Whole wheat Angel Food Cake with Easy Chocolate Frosting

first 1

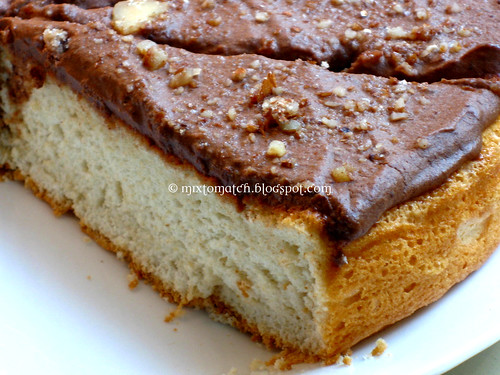
As much as I like the dense moist rich cakes, it takes a lot of rich ingredients that make it the way it is. For a light airy cake, today I tried to make one of my favorite cakes which has absolutely no fat in it. It is as light as a cake can get, and is called the Angel food cake. The main ingredient in this is egg whites which have been carefully separated from the yolks. Even a little bit of yolk, will mess with the whipping process. To ensure that, I separated one egg at a time in a small bowl, checked for shells/yolks that may have contaminated the egg white and then transferred it to a bigger bowl.
Use a very large bowl, since the egg whites tend to triple in size when whipped up.
Sifting the flour twice (once before adding to the wet mixture and once while adding to the wet mixture) is very crucial. Folding in the dry into the wet should be done gently or the whites will completely deflate and you will get a very sticky dense cake.
Normally Angel food cake is done with cake flour or all purpose flour. I substituted half of that with whole wheat pastry flour just to make it a little healthier.
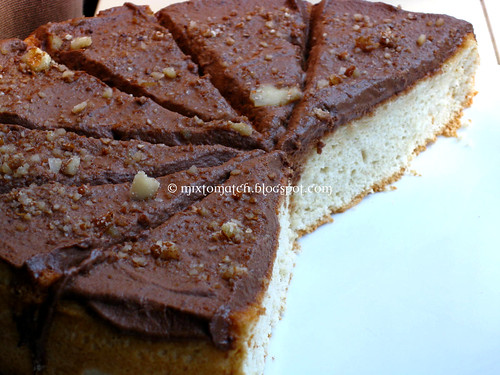
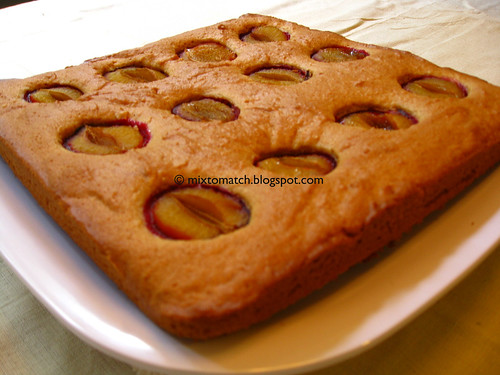
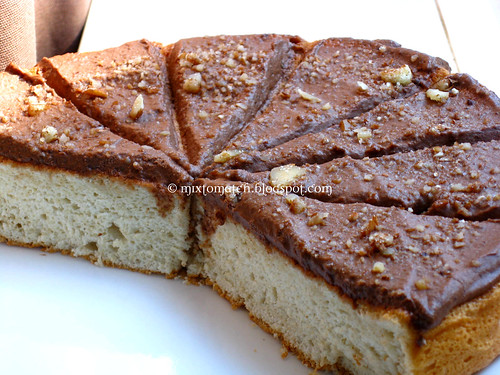
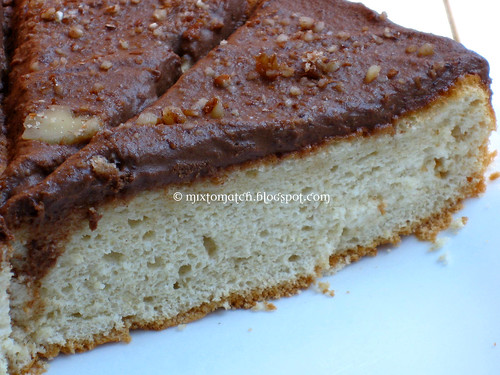
The cake turned out awesome, it was still airy in spite of deviating from the traditional usage of A.P flour entirely.
The chocolate frosting was just a second thought. I had some cream leftover in the fridge and decided to make a simple frosting which turned out the perfect topping for this cake.
Though the frosting is entirely optional, I would certainly recommend slathering on a little bit.
Tube pans are ideal for this kind of cake, but since I did not have one, I used a spring form pan, and had absolutely no issues with it. I did grease it before pouring the batter in.

One thing to keep in mind before you make this cake is, USE a hand mixer for whipping up the egg whites, and NEVER use a hand mixer while mixing the flour into the egg whites. Only fold gently with light hands just until combined.

first

Fat-free & Whole wheat Angel Food Cake with Easy Chocolate Frosting

Ingredients:

For the Angel food cake:

Egg whites - 8 large at room temperature
Cream of tartar - 1/4 tsp
Granulated sugar - 1/4 cup

Whole wheat pastry flour - 1/3 cup
All purpose flour - 1/3 cup
Powdered sugar - 1/2 cup
Baking powder - 1/2 tsp

Pure Vanilla essence - 1 tsp
Almond essence - 1/2 tsp

For Chocolate frosting:

Semi-sweet chocolate chips - 1/2 cup
Whipping cream - 1/4 cup
Splenda - 2 packets
Pure Vanilla essence - 1/4 tsp
Almonds - Chopped to sprinkle

Method:

For the Angel food cake:

Preheat oven to 350 F.

Sift baking powder, whole wheat pastry flour, all purpose flour and powdered sugar with the help of a sieve.

In another bowl take the egg whites, cream of tartar and whip using a hand mixer till soft peaks form. It will almost triple in size.
Now add the granulated sugar and whip again till you get stiff peaks. You wont need the hand mixer from now on.
Add vanilla and almond essence.

Now divide the dry ingredients that have already been sifted into three equal parts.
Take each part again in the sieve and sift right on top of the egg whites. Fold the flour using a rubber spatula. DO NOT beat the mixture.

After combined, add the other two parts one by one and fold very gently. Make sure not to deflate the egg whites.

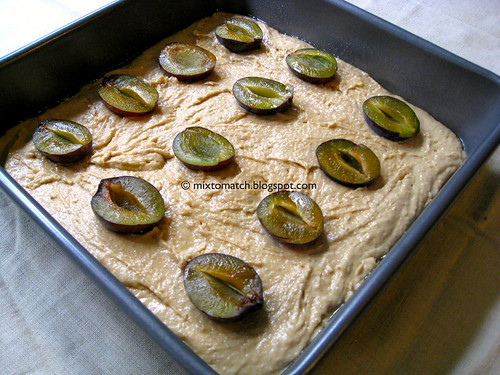
Transfer to a greased baking pan, I used a spring form pan (for lack of a better one.)

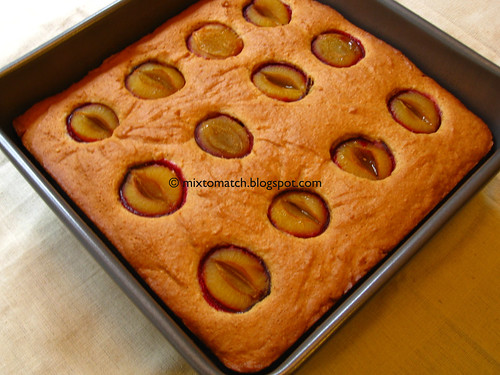
Bake for 30 minutes or till lightly brown/cracked on top. Test with toothpick for doneness.

For Chocolate frosting:

Whip cream and sugar using a hand mixer till creamy, you may also use store bought whipped cream.
Melt chocolate chips in the microwave with a dash of milk for a few seconds. Mix well till there are no lumps and the chocolate is silky and cool to touch.
Add the chocolate and vanilla essence to the cream. Whip again till well combined.
Refrigerate the mixture for 30 min to allow the frosting to thicken.

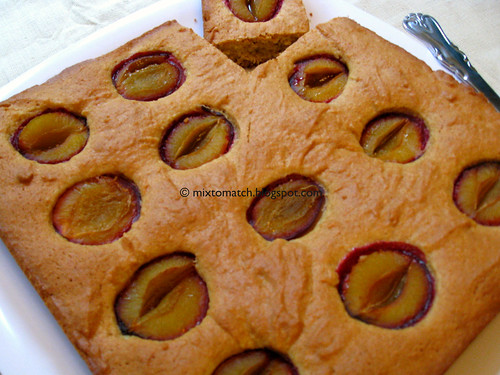
Spread the frosting over the cake, sprinkle the almond bits on top and refrigerate for about 15 min. Cut and serve.

last

last 1

June 29, 2009

Vegan Brown Rice Tortilla Sweet balls (Laddu)

First

Got very excited at the sight of brown rice tortillas. Rolls, wraps and a whole range of possibilities came rushing to my mind when I picked up a bag of these tortillas for the first time at my local health food store. They almost have a Indian chapathi look to it, with those little brown spots and beamed at me with a nice hearty look.
I cut them in half and then pieces to toast them in the oven, hence the half-moon look in the picture below.

Tortillas

Got home, opened the bag, tasted a little bit of the raw tortilla. Hmm, was not that impressed, I thought, maybe it would be better if I heated it a little. I was planning on making a egg salad wrap for breakfast this morning and lo and behold, there it was on block letters on the bag... that the product was gluten free and hence rolling them into anything would be quite a task. What it meant was that the thing broke at the slightest bend. Not a good start!
How disappointed I was :( But still I went ahead and toasted the tortilla on a griddle and served my egg salad on top. It really was not edible for me, ended up licking the egg salad clean, and the poor tortilla remained.

By that very afternoon, determined not to throw them away (I mean the rest of the tortillas, not the one I served the egg salad on!), came up with a sweet dish that could neutralize the slightly raw taste of these tortillas.
That was how these were conceptualized. They turned out beautifully just like I thought it would.
I surely go back for another bag of brown rice tortillas the next time. Just to make these sweet balls.
I think I will pass on making wraps with these unless I know really what to do with them.

I have been a tad busy with "stuff" and hence have not been able to visit other blogs regularly. But will be back after my long weekend holiday to see what you have been cooking. I hope you all have a fun Independence day long weekend, and enjoy the time with friends and family. See you soon with another recipe.

Middle

Vegan Brown Rice Tortilla Sweet balls (Laddu)

Ingredients:

Vegan butter/Regular butter (for a non-vegan option) - 3 tbsp
Brown Rice Tortillas - 5
Oat Bran - 1/2 cup
Powdered Jaggery (Indian brown sugar) - 3 tbsp (or add more according to taste)
Broken Cashewnuts - 2 tbsp
Raisins - 2 tbsp
Cardamom - 1/2 tsp
Rice milk/Regular milk - 2 tbsp (adjust accordingly)

Method:

Break tortillas into pieces and toast them in a preheated 400F oven for about 20 min till crispy.

Powder it using a food processor/blender and set aside.

In a microwave safe bowl, melt the butter. Add cashews and raisins and heat it for about a minute or till nuts are golden.

To this, add the powdered tortilla, oat bran, jaggery, cardamom and mix well.

Microwave again for a minute.

Take it out, add milk one tsp at a time and mix. You should be able to form balls by pressing together in the palm of your hands. Press tightly.
Store at room temperature for a day or two. Or refrigerate for up to a week.

Yields - 16 small laddus

Last

June 17, 2009

Home-made Garlic Hummus with Ricotta cheese

first

Bollywood in "So you think you can dance"! How cool is that?
There apparently was a Bollywood routine last season as well (which I seemed to have missed), but the fever this season is just at a whole another level because of the "Slumdog Millionaire" and the famous "Jai Ho" craze.
The dancers, Caitlin and Jason who performed to the Jai Ho song were pretty awesome. Some pretty great hand and foot work. I am no authority on dancing, but I have grown with enough Indian movies to know what an entertaining number would be. Our movies have an average of 5-7 songs a movie with actors twisting and turning their body parts in some graceful and some not so graceful moves.
Anyway, I just hope there is more Bollywood and more good dancing this season.
That said, my favorite was the samba performed by Max and Kayla. They just fired the stage up!
This dance oriented reality show (competition) airs on "Fox" on Wednesdays and Thursdays. Check your local guide for timings.

On to the recipe...
Today, we have a creamy hummus spread on a crunchy whole wheat pita bread.
I added part skim ricotta cheese to give it that light airy feel. You may omit it if you'd rather not have any dairy.
I toasted the pita bread using a bread toaster, came out really crispy and beats the pan heated pita any day. I did not have tahini on hand which is traditionally used while making hummus, so I used sesame seeds and ground it up into a paste. Tasted just as good.

middle

Home-made Garlic Hummus with Ricotta cheese

Ingredients:

Boiled chickpeas/garbanzo - 2 cups (canned will also work)
Toasted sesame seeds - 3 tbsp (or use sesame paste)
Red chilly flakes - 1 tbsp
Pepper - A pinch
Salt - To taste
Garlic - 2 cloves (use roasted for a more nuttier flavor)
Part skim Ricotta cheese - 1/4 cup
Olive oil - 3 tbsp
Cilantro - For garnish
Lime/Lemon juice - 2 tsp

Method:

Using a food processor or blender, make a paste out of toasted sesame seeds, red chilly flakes, pepper, salt, garlic with a little bit of water.
When you get a smooth paste, add chick peas and blend again into a smooth consistency.
Finally add the ricotta and drizzle olive oil. Give it a whirl just until combined.
Sprinkle the lime juice on top and mix with a spoon.

Spread over toasted whole wheat pita bread and top with chopped cilantro.

For pita bread, you may:

1. Heat it on a hot pan till lightly brown.
2. Cut into wedges and heat it in a preheated oven at 400F-425F for 10-15 min.
3. Cut a pita into 4 triangles and toast in a bread toaster for 3-4 min.(I followed this method)

last

June 10, 2009

Fresh Blueberry Oat "Cakes on a Pan"

first

I think whoever discovered pancakes was a dessert fanatic like me and decided to have some indulgence with something sweet first thing in the morning. Seriously that is what my take on cakes on a pan, well pancakes are. I actually like to think that it might have been me in my previous birth, if there existed one. :)

For this recipe, use fresh blueberries if possible, I got mine specifically for this. The reason for using fresh berries is this... when the heat hits the berries on the pan, those little rounds burst open oozing out a beautiful purple juice on the pancake. And my, oh my, seeing that first thing in the morning is a sight to behold.
So, I got a "huge" box from Costco, I used like a cup of berries for this recipe, and the rest is happily stored away. If you are aware of any healthy and easy recipes for blueberries, I would love to know. I need some help using the rest of the box...
(OR)
I will have to come up with some new wacky recipe that will for sure look good on my picture, which might trick you readers into commenting the ever so famous "Lovely picture, Nice recipe" comment. *wink*

Each and every stuff that went into making my pancakes are exactly what you want to kick off a day, protein from the eggs, whole grains from the whole wheat flour and oats, dairy from the milk, nutritious blueberries, a tad bit of sugar and butter for that feel good factor, and some grease to get you going through the day. All in one long sentence and pancake.

first 1

Fresh Blueberry Oat Cakes on a Pan

Ingredients:

Fresh blueberries - 1 cup

Whole wheat pastry flour - 1 cup
Old fashioned Oats - 1/3 cup
Milk - 1-2 cups
Eggs - 2 large
Baking powder - 1/2 tsp
Vanilla - 1 tsp
Butter - 1 tbsp
Sugar - 3 tbsp (or more depending on your sweetness level)

Method:

Cream butter and sugar. Add eggs and using a hand blender whip the mixture till light and creamy.

Add 1 cup milk, vanilla, baking powder and whisk again.

Add flour and oats and whisk well to combine. Do not over mix. The batter should not be runny or too thick. Add more milk at this point if need be. It should be thick, yet in pouring consistency.

Mix the blueberries.

On a hot griddle smeared with some oil, pour the batter in small circles. Do not spread. The batter should flow by itself.
When bubbles start to form on the top surface, flip the pancake over and cook on the other side.

Some berries will break open and give a beautiful purple juice onto the pancake itself. Enjoy it hot from the griddle with some agave, fruit preserves or syrup.

last 1

last

These pancakes are off to Jugalbandi's Click June 2009 - Stacks and Jeanne's WTSIM Berried Treasure

June 2, 2009

Parsley and Curry Leaf Buns

first

Last week has been kind of busy and I really, really wanted to post this today for fear of giving an impression that I was on another break!
I have been putting this off just because I wanted to get something else done, and ended up doing neither this nor that. Sounds familiar? :)
I have been doing some cooking and baking meanwhile, never let the stomach starve of yummy foods.

I am kind of getting a hang of how to make bread and buns without a standard recipe.
The permutation and combination of different types of flours, ingredients and techniques just make the experience of baking much more pleasurable.
By no means, I claim to be an expert in baking bread, but haven't really made one that was inedible :) At least. so far...

I made these buns as a fond remembrance to the savory bread I am used to back home.
I used vital gluten since I did not use bread flour which is specifically made for baking bread and buns. The gluten gives it a nice rise and that is not easily attained by using dense flours like whole wheat varieties.
You may substitute different herbs of your choice and customize this to your liking.
Toast these buns and drizzle some olive oil for a heavenly warm bite.
I used them as burger buns and they were amazing.

middle

Parsley and Curry Leaf Buns

Ingredients:

White whole wheat flour - 2 cups
Whole wheat pastry flour - 2 cups
Vital Gluten - 2 tbsp
Salt - To taste
Baker's yeast - 2 1/2 tsp
Warm water - 1/4 cup
Sugar - 1/4 tsp
Yogurt - 1 tbsp
Olive oil - 1 tsp
Curry leaves - 2 tbsp chopped
Parsley - 2 tbsp chopped
Pepper - 1/2 tbsp
Sesame seeds - 1 tbsp

Method:

Soak yeast in warm water along with sugar and let it sit for 15 minutes to foam and activate.

Meanwhile in another bowl, mix the dry ingredients - flour, vital gluten, salt and pepper.

Mix the dry ingredients with the activated yeast mixture, add oil and yogurt. Add the herbs and knead on a floured surface. Knead for 13-15 minutes by hand, or use a kneader attachment on the mixer. The dough should be soft and smooth.

before rise

Cover and let it sit in a warm place for about 1 1/2 hours or till it doubles in size.

after rise

After that, take the dough, fold it over 3 or 4 times, releasing the air bubbles. Pinch into smaller balls, roll them neatly and firmly. Place it on a baking tray with enough room to expand while baking.

before proof

Cover with a cloth and place in a warm place again to rise. This method is called proofing.

after proof

Preheat oven to 375 F.

After an hour, brush them with oil or an egg wash on top. Sprinkle sesame seeds and bake till the buns are golden brown on top.

Let it cool and slather with a spread/butter of your choice and devour.

last

last 1

May 22, 2009

Low-Calorie Sweet Semolina Balls (Rava Laddu)

first

These semolina laddus are a regular in the traditional Indian dessert menu. Normally hot ghee (clarified butter) is poured onto the flour and sugar mixture to bring them to a mass and then they are rolled into small balls. Even though those sweet rounds melt in your mouth, I am not sure they would be melting away from the hips anytime soon.

One thing to note is, when adding the warm milk (according to my method given below), make sure you do not add too much of it. I cannot stress the "less is more" theory on this one. As soon as you are able to form balls with the mixture (when it is still kind of dry) stop adding the milk, and work quickly. You may add more milk if the mixture starts to dry up at the end.
And when I say add milk, go by one tablespoon at a time. A very crucial step. Or one will end up with hard laddus at the end. They should break when slight pressure is applied. And that is a sign of a great laddu.

When you dry roast the semolina, and then grind it, do not expect it to turn into a powder completely. It will still remain slightly coarse. If you do achieve to make it into a fine powder, good for you! Please do share your tips as to how you do it.

I made them the first time a few years back, even before starting this blog. After making this version without the fat, I have never looked back.
There are many versions available on the Internet to make them, but here is my version of it.

middle

Low-Calorie Sweet Semolina Balls (Rava Laddu)

Ingredients:

Fine semolina - 1 cup
Powdered sugar - 1/2 cup (I used less, you may adjust according to taste)
Cardamom - 1/2 tsp
Broken cashew nuts - 3 tbsp
Raisins - 2 tbsp (optional)
Warm milk - Enough to form a ball
Melted butter/Ghee - 1 tbsp

Method:

Dry roast semolina well. Turn off heat just before it starts to turn slightly brown.
Let cool.

In a dry blender, grind semolina till powdery. It may not turn completely into a powder form, but close enough is good.

Add the powdered sugar, cardamom and blend the dry ingredients well.

Take the mixture in a bowl, add ghee, cashews and raisins.

Adding warm milk one tablespoon at a time, mix everything together. Just when it starts to form a ball, stop adding more milk. Quickly form into balls using the palms of your hands.
Adding too much milk will result in hard laddus. The lesser the better.

Place laddus in a layer on a plate and let cool.

Enjoy them without the guilt.

last

May 16, 2009

Lite Coconut Milk - Mint Pulao

First

There are only good memories associated with this recipe. One of my mom's best dishes, which in order to perfect took innumerable attempts for me. She uses wonderful thick first-press coconut milk from home grown coconuts and it gives it this rich texture and taste.
The only changes I made from her recipe, is using lite canned coconut milk (fewer calories!) and adding my favorite herb on this planet... Mint.

So, when I say attempts, it involved using a varied combination of fresh coconut milk, canned coconut milk, light canned coconut milk, brown rice, and then white rice.
This recipe is traditionally prepared using white rice in my family, but since I have switched to brown rice, I did initially try with it. It was absolutely tasteless! Not a good idea!
See, the part of enjoying this is the subtle taste of the coconut milk hitting you when you bite into the rice. My brown rice failed to absorb anything at all! And tasted like I cooked it with water instead of luscious coconut milk.
There are certain dishes that are not meant to be changed, and I guess this is one such recipe. If you are making this, use only White rice, there I said it!
Using basmati rice will enhance the experience, if not just use Jasmine or any long grain rice.

The rice grains after being cooked, should be light, fluffy and not mushy. Here's how I did it.

First 1

Lite Coconut Milk - Mint Pulao

Ingredients:

White Basmati Rice - 3 cups
Mint - A bunch
Lite Coconut milk - 3 cups
Water - 2 cups
Dry Bay leaves - 2
Cloves - 3
Cinnamon stick - 1
Dry Star anise - 1
Whole Cardamom - 2
Whole pepper - 3
Green chillies - 1 small chopped
Ginger - 1 inch chopped
Garlic - 3 cloves chopped
Olive oil - 2 tbsp
Salt - To taste
Roasted cashews - 2 tbsp

Method:

Clean and soak rice with some water for 15 minutes.

Finely chop mint, or use a blender like I did and grind the leaves with a few drops of water till they are mushy.

In a pan, add oil, when hot add all the spices, fry for a minute then add green chillies, garlic, and ginger. Saute well.

When all the above ingredients are well roasted, drain water completely from the rice (use a strainer), and mix it will the spice mixture.
Roast the rice till it turns opaque and the oil coats the grains of the rice completely. Add the ground mint and salt.
Mix well.

Transfer to a rice cooker, add the coconut milk and water. Mix thoroughly. You may need more or less water depending on the type of rice/cooker you are using.
My rice cooker senses the amount of liquid and cooks accordingly. If you are using a regular cooker/ a different type of rice cooker, then check the water content.

When done, add a tsp of oil and fluff the rice with a fork. Check for salt. Garnish with roasted cashews and mint. Serve with onion raita.

Last

Sending this dish to:

Nags's Monthly Mingle #33 - Ravishing Rice Recipes
Ashwini's JFI:Mint

May 12, 2009

Roasted Carob Cookies with Walnut Meal and Oat Flour

Recipe Source: Some part of my head that still has some iota of creativity!
This is my own recipe. And I go "whoo hoo."


first

Do you believe in celebrating Mother's Day? Or do you think it is just another commercial gimmick for boosting sales of cards, flowers, chocolates and the likes?
Acknowledging a mother on one day of the year seems a little absurd, but then why not? I am glad someone thought about it! It is a sad thing that we need to set just one day apart for a selfless soul, but if that gets the deed done... I am all for it.
After all, that is one soul that never stops loving you, no matter what.
Nothing or nobody replaces a mother. Ever.

This is my second cookie on my blog. I am not the organized kind that could sit down write a recipe, and then follow it to the T. I baked these cookies with what I had and what I liked, and it turned out just perfect. Since it is my own recipe, it is kind of very near and dear to my heart.

Carob powder is used as a chocolate substitute, and is derived from the pods of the Carob tree. It is naturally fat free, and is also extremely bitter. So watch out. Adjust the quantity of the powder if you are particular about the sweetness. Coco powder should work fine too.
The one I used here is the roasted kind, and would be available at the speciality section at your grocery store.

Walnut meal is nothing but ground walnuts. I keep my whole walnuts stored away in the freezer. For this I used a blender to process them. While grinding, it turns from powder to a wet mass very quickly. Mine did, and I used it slightly wet. This should not pose a problem.

Oat flour that I used was pre-ground from the store and was very fine. I have noticed that if you need to reach that same texture with regular/quick cooking oats, then you need to grind it for a longer time and also sift it.

IMG_5255

Roasted Carob Cookies with Walnut Meal and Oat flour

Ingredients:

Oat flour - 1 cup
Milk powder/Mava/Khoya powder - 1/2 cup
Roasted Carob powder - 3 tsp
Baking soda -1/4 tsp
Pure vanilla - 1 tbsp
Butter - 4 tbsp
Sugar - 4 tbsp
Walnut meal - 1/2 cup

Method:

Preheat oven to 350F.

Using a hand mixer whip up butter, sugar and walnut meal.

Add vanilla.

In a separate bowl mix oat flour, baking soda, milk powder, and roasted carob powder.

To the wet ingredients slowly add the dry ingredients and mix well either using the hand mixer or a rubber spatula.

You should be able to form a ball with the dough.

Pinch off smaller rounds and roll them into small lime-sized balls and place them on a greased cookie sheet. Place them 2 inches apart. They will spread out.

pre bake

Bake them for about 20-25 min or more. They will spread and crack on top. When they are crispy around the edges, remove and let cool on a cooling rack.
Temperature of your oven may vary, so please keep an eye on them after the 20 min mark.

last

Yields: 16-18 cookies depending on size.

first 1

Sending it off to
Jai and Bee's Click May 2009 - Cookies
Srivalli's Mithai Mela

May 6, 2009

Whole Wheat Dimply Prune Cake - Where have you been?

First

There, I made it!
Well now, I have to make a small speech.
I know, I have been MIA for awhile, hmm... what shall we call that now? Writer's block, I-experiment-too-much-that-I-ran-out-of-ideas (oh come on, that is not going to happen, you know that!), or just sheer laziness.
Like William Shakespeare named it, I am going to leave that up to you "As you like it." :)
Having said that, I am thankful to all the emails and comments/messages I got during my short, er... shall we call it a long break. I am perfectly fine, and all my ten digits are intact and I never could be happier for them.
Sometimes, it feels good to be missed! I totally enjoyed all the attention ;)
Can I get more?

During my time away, I did manage to check on some of your blogs, even though I could not comment, I now want to let you know I was there.
Generous souls have showered my blog with awards, which I would like to acknowledge here. I appreciate every little gesture. Merci. I will get around to visiting other blogs and your posts soon.

I have some amazing recipes, some of which, or a lot of it are my own creations as usual. If you have followed my blog, you would know me and my love for experimenting with food, and making healthy, wholesome eatables.
If you are new here, then "My Archives" would be a great place to start.

I am going to celebrate my being back in the blogging arena with a cake today. If you are as thrilled as me, you could send me cakes too, real ones I mean ;)
And my address is...

What cake are we talking about today? A cute one, a healthy one and a sure-to-impress deal. You will need nice ripe prunes (mine were not), and after cooling the cake, the juices from the prunes do soak into the cake, making it soft and moist.
There are a lot of recipes on the internet for this cake, but I adapted my recipe from Smitten Kitchen, just because I fell in love with the way it looked. How can I not! It is a beauty.

First 1

Whole wheat Dimply Prune Cake

Whole wheat pastry flour - 1 1/2 cups
Cardamom powder - 2 pinches
Baking powder - 2 tsp
Salt - A pinch
Unsalted butter - 4 tbsp
Light brown sugar - 1/2 cup
Eggs - 2 large
Sunflower oil - 2-3 tbsp
Vanilla extract - 1 tbsp
Cold milk - 1-2 tbsp (optional)
Red prunes/plums - To top, as shown in picture. Use as many as you like.

Method:

Sift flour, salt, baking powder and cinnamon and set aside.

Halve the prunes and take the seeds out.

Prunes

Butter/spray a 8" square cake pan, dust scantily with flour if you are buttering it.

Preheat oven to 350F.

In a mixing bowl, combine butter and sugar till light and creamy with the help of a hand mixer. Use room temperature butter for best results. Add the oil next.

Add eggs one by one and keep whipping. When the mixture reaches a very pale yellow color (about 5 min), stop and add vanilla. Mix well.

Add the sifted dry ingredients slowly and combine well (you should still be using the hand mixer). Be careful not to over mix, when you see the last bit of flour mixed with the wet ingredients, stop. Over mixing the batter will result in a tough cake.
If at any point, if you feel the mixture is too thick, you may add a tablespoon or two of cold milk to loosen the batter.

Pour the batter into the cake pan. Top the batter with halved prunes/plums with cut side facing up.

Batter

Bake at 350F for about 30-35 min. Check for done'ness with a toothpick insert test.

Out of the oven

Remove from oven, cool on rack, right side up for about 20 min.

Cut into squares like I did, or do whatever you want with it. Its your cake now!

Last

Sending this cake off to Meeta'a Monthly Mingle #32 – Spring Cakes

February 4, 2009

There is a new foodie on the block

Curiosity got you?
My mother-in-law has a blog of her own now (been a couple of days to be exact!) :)
You can check her out at "Gramina Kitchen"
The link is http://graminakitchen.blogspot.com/

She is an amazing cook, and I really mean it. She can whip up a great meal in no time, and her food blog will focus on South Indian traditional vegetarian cooking.

Do check her out at her blog. Just wanted to drop a line about it.

And as for my blog... I have been due for my next post, I know, I know... will post it soon... :)

January 31, 2009

Brown Basmati Egg Biriyani with Chickpeas

IMG_5320

This recipe is for a friend who asked me once... "How do you eat brown rice, I just can't seem to get used to it!"
I am sure she would be reading this today :) And I hope I can convert her from White to Brown with this recipe.

Brown rice has a lot of benefits. For one, it is very filling and you would tend to eat less. Well, there's a start!
It falls under the whole grain variety which seems to be recommended a lot these days. You must have seen those "Get more whole grains into your diet for a healthier you" appearing everywhere. If you haven't seen it, then you are looking at the wrong places, er... defnitely not in a fast food place.

So, what exactly is the difference between a brown and white rice, you may ask...
When only the outer husk is removed you get brown rice, and when the inner bran layer is removed you get white rice. Seems simple, but the bran layer is what packs all the nutrients. All that remains is white rice and carbs after stripping the grain of all its actual goodness.

Nutritional benefits of brown rice: They are rich in fiber, fatty acids (that lowers cholesterol), certain vitamins and Iron.

How to prepare brown rice:
If you have a rice cooker, then put it on "Brown rice" setting and forget it. Most modern rice cookers have this setting.

If you are using the conventional method, then wash the rice. Soak in warm water for at least an hour or two. Add water in the ratio of 1:2 (or in some cases 1 1/2). Depending on rice and texture preferences, these ratios might change. Always check your package instructions for how much water is recommended for one cup of rice.
Cook using a microwave cooker or cook on stove top like you would normally do for white rice.

Soaking brown rice is important. It allows germination and making it much more nutritious.

Changing from white to brown, does take time and you may not enjoy the fuller taste and feel of brown rice initially. But if you care more about your health, then more power to you!

This is a easy recipe to make especially if you are trying out brown rice for the first time. Egg Biriyani is an Indian dish normally prepared with rice, some vegetables and eggs of course.
I added chick peas to give it that added bite and flavor.
This is only kind of biriyani I make at home and I just love it.

IMG_5298

Brown Basmati Egg Biriyani with Chickpeas

Ingredients:

Eggs - 4
Brown Basmati Rice - 3 cups
Garbanzo/Chickpeas - 2 cups (canned or soaked and cooked)
Red onion - 2 cups (chopped)
Tomatoes - 2 cups (chopped)
Egg Biriyani masala - 2 tsp
Ginger - 2 tbsp chopped
Garlic - 4-5 cloves sliced
Bay Leaf - 1
Cloves - 2
Turmeric - 1/2 tsp
Curry Leaves - 4 to 5 torn by hand
Pepper - 1/4 tsp
Fried Onions - 2 tbsp (To garnish, optional)
Olive oil - 2 tbsp
Salt - To taste

Method:

Hard boil eggs and keep separately.

Cook brown rice according to package instructions, which includes soaking in warm water and then cooking it with rice cooker or on the stove top.
The cooked rice should be al dente, not mushy. Cool completely.

In a wide pan on medium-high heat, heat oil, add cloves, bay leaf, curry leaves, ginger, garlic and saute well.

Add onions and saute till slightly brown. Add turmeric and salt.

Next add the tomatoes, pepper and saute for at least 5 minutes on medium high heat.

Add the egg biriyani masala and saute again. Add the garbanzo/chickpeas and mix well. Let the chickpeas cook for a while in the masala.

Score the eggs with a knife, or split them in half and add it to the masala.

At any point if you think the masala is too thick, add a little water. I normally don't do this, since the rice tends to become soggy when mixed together.

Turn off heat and then add the cooled cooked rice and mix well with a little oil to keep the rice grains separate.
Make assessment as to how much rice will be needed for the masala you make. Add more or less rice according to taste and heat level.

Mix thoroughly. Just before serving, add the fried onions and serve it along with yogurt raita.

IMG_5317

This dish goes to:

Alexandra's Chefspiration's Healthy Choices
Ms's JFI Chickpea
Sudeshna's Harvest: The Festival of Rice

January 24, 2009

Mini Churros - Baked vs Fried

IMG_2973

Commonly referred to as "Spanish doughnuts", Churros are originally a Spanish breakfast dish which are deep fried and then coated with sugar. I was first introduced to Churros at Costco (the little eatery they have) by a friend of mine while we were shopping.
Bunch of girls, walking around a store for hours together, shopping, what else would anyone expect!
They were a $1 each and we were in love with it. I have so badly wanted to make them at home ever since but without deep frying them.

That is when I turned to my trusty puff pastry sheets that always reside in my freezer. I love making vegetable puffs or egg puffs with them, and this time we have something sweet. Please note that puff pastry sheets by themselves have butter in them, that is how the layers are formed, so remember the term "relatively" guilt-free.

I cut the pasty sheet into strips, drenched them in cinnamon sugar, twisted them and baked them till golden. Taste wise, if you have had churros before, then you will know the difference since these are baked. But if you have no clue as to what the original tastes like, then you will be pleasantly surprised. They taste awesome and with a little dulche de leche to dip... can't ask for a better relatively guilt-free dessert.
If you don't have dulche de leche, then try dipping them in caramel or nutella.
Oh! Please don't drool all over my blog! :)

IMG_2980

Mini Churros - Baked Vs Fried

Ingredients:

Puff pastry sheets - 1
Cinnamon - 1 tsp
Sugar - 1/4 cup (They don't take up so much sugar, it is only for coating, you will have some left over)
Egg - 1/2 beaten (optional)
A.P flour - To dust

Method:

Thaw out pastry sheets according to package instructions. It should be at room temperature or slightly still cold.

Preheat oven to 400 F.

Mix cinnamon and sugar in a bowl and keep them ready.

Spray a cookie sheet with non-stick spray and set aside.

Unfold the sheet, dust a little All purpose flour if need be and roll out slightly.

Cut into thin strips of desired lengths. I did mine about 3 inches long and 1 inch thick.

Brush beaten egg on both sides roughly. Coat with the cinnamon and sugar mixture.

Lay them on the cookie sheet with little space in between them so that they can puff up.

Bake at 400F till slightly golden brown on top.

Serve with caramel, nutella or dulche de leche.

IMG_2981

January 22, 2009

Spinach and Anaheim Chutney

first 1

So, I really did take a tiny break for a few days since my last post!
Although not intended as a break, it morphed into one. I still have managed to catch up on some posts from other blogs, even though I have not been able to let my presence known.
So here I am, back to posting and visiting other blogs.

Seems like my Recipe for Disaster Series that I started last week was a serious hit. I gave a huge sigh of relief since I did not know how that was going to go down as a post. Some even suggested having events for disaster recipes, which I think is an awesome idea and seems like there are a lot of people like me around who would be willing to participate :)

After all that complaining and whining about how those food turned on me, let us take it easy with some Spinach and Anaheim chutney.
It really did not kick off as one, I was actually making onion and tomato chutney and then decided to throw in a good quantity of fresh spinach that was leftover after making salad the previous day.
Anaheim peppers were just an added bonus for that little kick.
Spinach is one of the greens that is easily available either fresh or frozen all year around and one of the most healthiest things too. It made for a great chutney and we enjoyed it with some dosais/crepes for dinner.
Here is my recipe for this chutney which was just made on the fly.

first

Spinach and Anaheim Chutney

Ingredients:

Red Onion - 1 medium chopped
Tomato - 1 medium chopped
Anaheim chillies - 1 medium sliced
Fresh spinach - 4 handfuls
Cumin - 1 tsp
Pepper - 1/4 tsp
Ginger - 1 inch piece
Garlic - 2 cloves
Salt - To taste
Olive oil - 2 tsp

To season:

Mustard seeds - 1/2 tsp
Urad Dal - 1/2 tsp
Curry leaves - About 3 leaves

Method:

In a pan on medium high heat, add olive oil and drop the cumin seeds, ginger and garlic and saute till lightly brown.

Next add the onions and saute till it becomes translucent.

Add Anaheim chillies, tomatoes, salt, pepper and cook under medium flame till everything is just done.

saute

Turn off heat, add the spinach and mix well. The heat from the mixture will wilt the spinach. Do not over cook.

Allow to cool slightly. Add a little water and grind it in a blender till really smooth.

Transfer to a serving bowl.

In another pan, add a little oil, then add the mustard seeds and urad dal. When the mustard seeds start to splutter, turn off heat and add the curry leaves.
This would be the seasoning for the chutney. Mix well and serve.

last

I am sending this to:
Ramya's Chutney and Dip Mania
Alexandra's Healthy Choices