November 10, 2011

Kurma Pasta

IMG_3170

This recipe works for me on so many different levels... I am not too fond of a tomato-based sauce with my pasta, and this is a great way to use over my leftover kurma from the previous day.
Even though I had entertained the thought of marrying the Indian kurma/korma and the Italian pasta, my aunt's "Kurta" (Pasta+Kurma, my cousins put that term together, so smart I think!) was what inspired me to eventually try this. She had used a combination of kurma and marinara sauce for her pasta if I am right. I decided to omit the marinara, and added some ricotta cheese for a creamier texture and give it some body.
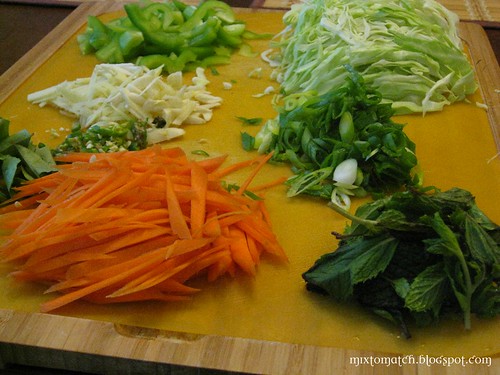
You can use the very same kurma that you make at your house, whatever different blend of spices and vegetables that you throw in normally will work. Even some leftover kurma from the dinner you had from your neighborhood Indian restaurant the previous night will be perfect. But make sure the kurma that you add is something that you will enjoy eating in the first place. There is no point in adding something that does not taste good. It might eventually spoil the entire pasta dish.

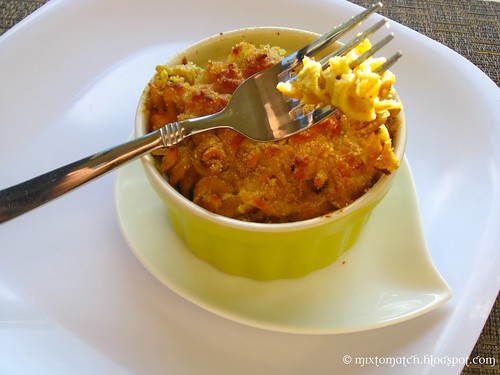
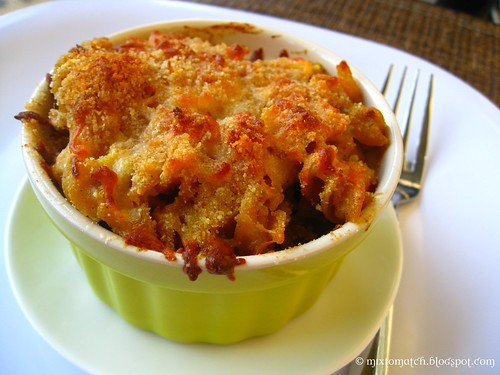
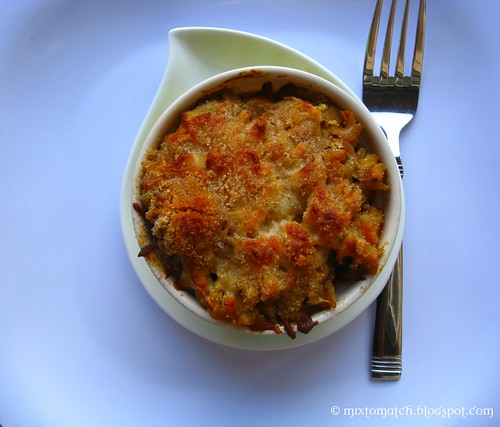
Baking and serving it in individual ramekins makes for a pretty presentation and this way everyone gets a fair share of that lovely crust we put on top.

IMG_3168

Ingredients:

Whole wheat pasta (any shape) - 1 lb box
Leftover vegetable Kurma - 3 cups
Ricotta cheese - 1 cup
Plain bread crumbs - 1 cup
Parmesan cheese - 2 tbsp grated
Mozzarella cheese - 1 cup
Salt - To taste
Oil - 1 tbsp

Method:

Preheat oven to 425F.

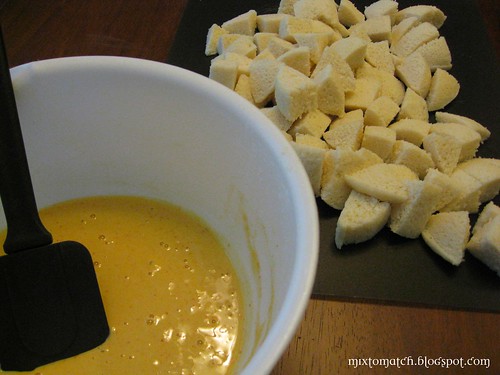
Cook pasta in a quart of boiling water. Remove before it is fully cooked. It will continue to cook in the oven with the kurma, so try not to over cook them at this step.
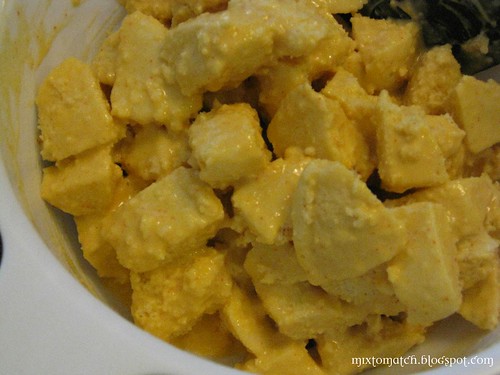
Drain the pasta, and now add oil, ricotta cheese and mix well. Then add the kurma and salt if necessary (if you haven't already salted the pasta water)
Spoon the pasta mixture into small ramekins. Spread a little of the mozzarella cheese a little on each cup. Sprinkle the bread crumbs mixed with the Parmesan cheese on the top.
Drizzle a little olive oil at the end.
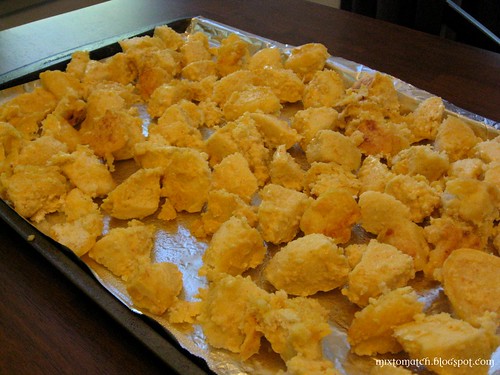
Now place the ramekins in an oven-safe tray and bake till the top is brown and bubbly.

IMG_3171

Let it cool down a little bit and enjoy.

IMG_3175

August 5, 2011

Baked Gulab Jamun

IMG_6526

Yes! You heard it right! They are baked... these beauties are not fried, not this time around... :)
This recipe is dedicated to my cousin H. I promised her one for her bridal shower and never got around giving it to her. I wanted to make something healthful, an Indian dessert and one that I could create just for her. I have tried this recipe a couple of times once from a ready made mix and another time from scratch. Both have turned out very well. So here is the recipe for you my dear H...

Note: The jamun balls once placed in the oven needs your utmost care and patience. This recipe switches between baking and broiling in your oven. When you turn the broil mode on, you cannot take your eyes off the oven. It takes just seconds to burn them, so giving you all a heads up.

IMG_6510

Baked Gulab Jamun

For the Jamun:
Khova powder/Mava powder - 1 cup
All purpose flour - 1/2 cup
Ghee/Clarified butter - 1 tsp
Baking soda - 1/4 tsp
Cardamom - 1/4 tsp
Skim Milk - 2 tbsp (just enough to make a stiff dough)

For the Sugar Syrup:
Sugar - 1/2 cup
Water - 1/4 cup
Corn Syrup - 2 tbsp
Rose essence - 1/4 tsp
Cardamom - 1/4 tsp

Saffron - For garnish

Method:

Preheat oven to 375F.

For the sugar syrup, Place a pot on medium heat, add sugar, water and corn syrup and let it boil till it reaches a syrupy consistency. The corn syrup prevents the sugar from crystallizing. You can omit this if you are familiar with making this kind of syrup. Switch off the flame and add the cardamom and rose essence. Set aside.

In a mixing bowl, combine all the ingredients listed under "Jamun" and knead well to make a stiff dough. Make small balls and place on a greased baking sheet. Place the tray in a pre-heated 375F oven. Bake the jamun balls till they are very lightly brown on the bottom. Just around that time, switch the oven to broil mode and let the jamuns get golden brown on the top. Make sure to keep a constant look on the tray, as the broil mode in an oven typically reaches 500F, and will burn the jamuns in no time. This should take about 2 minutes or less.
Once the jamuns are brown on both sides as shown in the picture, take them out and plop them into the sugar syrup and let it soak. You may make more sugar syrup if you like, the recipe that I have given makes just enough to soak the jamuns. It was my way of not adding too much sugar into the recipe.
Allow to cool completely and enjoy.

IMG_6525

IMG_6517

July 16, 2011

Corn and Black beans salsa with Baked Corn Chips

IMG_3197

Some dishes though simple are capable of making a meal by itself. This dish belongs to one of those categories. I know it sounds more like an appetizer, but with the chips being baked, it may not be all that bad to indulge in a few more. And it is pretty filling as well with the beans and corn. The salsa is pretty chunky and that is how we like it. The texture contrast makes for one amazing party in your mouth.

IMG_3187

Corn and Black beans salsa with Baked Corn Chips

Ingredients

For the Salsa:
Frozen cut yellow corn - 1/2 cup thawed completely in a microwave
Black beans - 1 can washed thoroughly under cold water
Tomato - 1 medium chopped
To blend:
Tomato - 1 large
Serrano chilly - 1
Onion - 1
Garlic - 2-3 cloves
Cilantro - A handful
Salt

For the corn chips:
Yellow corn tortilla
Oil
Salt and Pepper

Method:

Chips:
Preheat oven to 400F.
Stack the tortilla one on top of the other and keep drizzling a tiny bit of oil in between each layer.
Cut it into four or more wedges depending on the size of the tortilla and lay it on a baking tray without touching each other. They should be apart for the chips to crisp up. Bake for about 5-8 min or till the edges start to brown. Immediately remove and sprinkle salt and pepper. Cool before eating.

IMG_3184

Salsa:
Quarter the onion and lay it on a pan without oil. When they start to brown or blacken (yes, it is okay for the onions to become black where it touches the pan, it adds a smoky flavor), then add the Serrano chilly and garlic. When they start to brown up, add all of it to a blender with the tomato and cilantro. Blend it smooth.
In a bowl, add the beans, thawed corn, salt and the blended mixture.
You may add more cilantro for garnish.

IMG_3188

February 18, 2011

Chocolate and Walnut Loaf

IMG_5384

For all practical purposes this is a cake. Except that it is made in a loaf pan to give an appearance of a loaf of bread. We love this here at home, made it plenty of times and just can't seem to get enough of it.
The chocolate on top adds to the decadence and the sensual aspect of this loaf, you could totally omit this if you watching what you eat.
Adding oil instead of butter yields a very moist cake, whereas you can't beat the buttery taste when you add the latter. I don't care that much for the buttery goodness, so I add any neutral tasting oil to it.
Ahem, I could write more... but really, if you will excuse me, I need to get back to eating my slice... :)
Happy viewing!

IMG_5400

Chocolate and Walnut Loaf

Ingredients:

Whole wheat pastry flour - 2 cups
Sugar - 1/2 cup
Baking powder - 1/2 tsp
Baking soda - 1/2 tsp
Egg - 1
Skim milk - 3/4 cup
Vegetable Oil/Butter - 1/3 cup
Vanilla - 1 tsp
Semi sweet chocolate chips - 6 oz.
Chopped walnut - 1/2 cup
Melted chocolate - To drizzle on top

Method:

Preheat oven to 350F.

Cream together butter and sugar together using a hand/stand mixer. Add egg and vanilla and beat well.
Sift together baking soda, powder and flour.
Add the flour mixture and milk alternating between the both till everything is combined.
Fold in the chopped walnuts and chocolate chips.

Transfer the mixture onto a greased loaf pan and bake at 350F for about 45-55 min.

Check if the loaf is done using a toothpick. Insert it into the middle. It should come out clean.

Let it cool on a wire rack and then drizzle melted chocolate on top. The top of the loaf will be cracked a little bit. It is normal.

IMG_5383

February 15, 2011

Baked Idli (Rice cake) Manchurian

IMG_6885

Me missing from the blogging scene is not even a surprise now! I love cooking and blogging, but other things take priority every now and then like it rightfully should, so this time I am not even going to the why and what of my absence. But I am happy to blog at the moment and I will relish this till I am done with this post.
Idli Manchurian is not something I ate a lot or was familiar with when I was back home. I probably have had it a couple of times, not because I did not like it but because it was way too greasy and unhealthy. It is made by frying the Idli pieces that were dipped in batter and then stir fried with vegetables and sauces. Sounds yummy right? I know!
For my version, I baked them (vs. frying) and tossed it with a bunch of crunchy vegetables and tomato sauce and called it a day! It tasted good and knowing that I am eating something good made me a very happy camper right there in my kitchen.

IMG_6878

Baked Idli (Rice cakes) Manchurian

Ingredients:

Steamed Idli (Rice cakes) - 6-8 cut into cubes
Carrot - 1 cup shredded
Green pepper - 1 cup shredded
Cabbage - 2 cups shredded
Ginger - 2 tsp chopped
Garlic - 3 tsp chopped
Mint leaves - 1 cup chopped
Curry leaves - About 6 leaves chopped
Spring Onion - 1 cup chopped lenghtwise
Salt - To taste
Soy sauce - 2 tbsp
Tomato ketchup/sauce - 2 tbsp
Corn flour - 1 cup (Chick pea flour/besan flour should also work)
Rice flour - 2 tbsp
Chilly powder - Depending on your heat level
Turmeric powder - 1/4 tsp (optional)
Black pepper -1/2 tsp
Oil - 2 tbsp + 2 tbsp

Veggies

Method:

Preheat oven to 400 F.

Mix the corn flour, rice flour, salt, 2 tbsp oil, chilly powder (about 1/2 tsp), turmeric powder with a little water to make into a paste.

Mix

Add the idli pieces and mix well. The batter should be just enough to coat the pieces.

Marinate

Spread it evenly on a greased baking sheet and bake until lightly brown and the coating of batter is baked. Check after 15 minutes of placing the tray in the oven.

Bake

Meanwhile in a large wok, add the oil, when hot add the curry leaves, ginger, garlic, pepper. Then add the veggies and stir fry with some salt. Add the mint and spring onions, soy sauce and tomato sauce at last. Now, add the baked idli pieces and mix well till it absorbs all the sauce and flavors from the veggies and herbs.
Serve hot.

IMG_6874