August 25, 2010
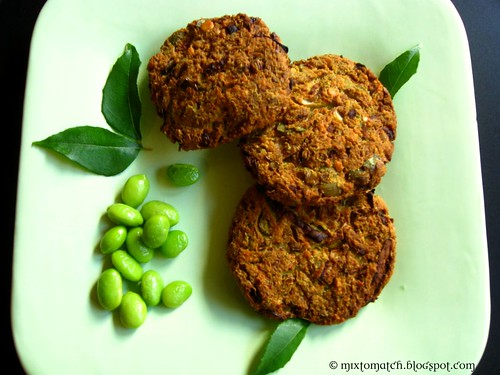
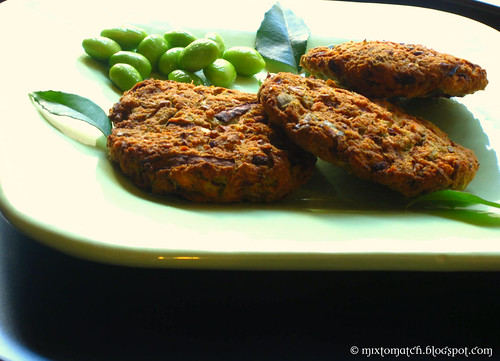
Baked Edamame Fritters - Secret to a perfect no-fry Vadai
Vadai/Indian fritters is by far one of the most loved snacks down South of India. A rare cold afternoon with rain thrashing down on the roof calls for a hot cup of chai and its most beloved companion - Masala Vadai.
The aroma of the vadais wafting from the gloomy kitchen with Amma frying them up ever so elegantly with me wrapped up in my blanket standing beside her is a memory that I cherish and yearn for even now.
My daughter would probably have memories of her mom pulling out a tray of healthy vadais right from the oven as opposed to frying them up!
I have already tried my hands on baked masala vadais, and they came out beautifully. It uses a different procedure.
Baking is not the same as frying them, agreed... but pretty close with the new method I have come up with. And without all those calories, do I hear anyone complaining?
Okay, here is the secret: "broiling"
Baking the vadais for about 10-15 minutes, and then putting the oven on broil mode for 2-4 minutes and getting that beautiful crispy crust on the top is as close you will ever get to frying them.
So the concept is, the fritters cook from below when you "bake" them, and then from above when you "broil" them. The coil heats up from the respective sides when you use the bake and broil mode.
And voila! You have the best crispy healthy vadais you will ever have!
Note: Do not move away from the oven when it is on "broil" mode. Temperatures reach up to 500F- 525F and will burn whatever is in the oven in no time.
Baked Edamame Fritters - Secret to a perfect no-fry Vadai
Ingredients:
Edamame - 1 lb bag
Channa Dal/Dried split chickpeas - 1 cup
Cabbage - 1/2 cup chopped
Green chillies - 3 tbsp chopped
Red onions - 1 large chopped
Ginger - 2 tsp chopped
Rice flour - 1/4 cup
Garam masala - 1/4 tsp
Turmeric - 1/2 tsp
Asafoetida - A pinch
Chilly powder - 1 tsp (adjust heat according to your taste)
Curry leaves - 3 tbsp torn into pieces
Salt - To taste
Oil - 2 tbsp
Method:
Soak the channa dal/lentils in water for about two hours.
Cook Edamame until it is al dente. Do not overcook, it shouldn't be mushy.
Preheat oven to 400F.
Grind the channa dal/lentil and edamame until coarse. Do not make a smooth paste out of it.
In a large mixing bowl, add the ground up lentil and edamame. Add all other ingredients and mix well.
Take a large baking tray, line with aluminum foil and give a good shot of non-stick spray.
Take small balls of the mixture, flatten it in your palm and line them out on the baking tray like shown below.
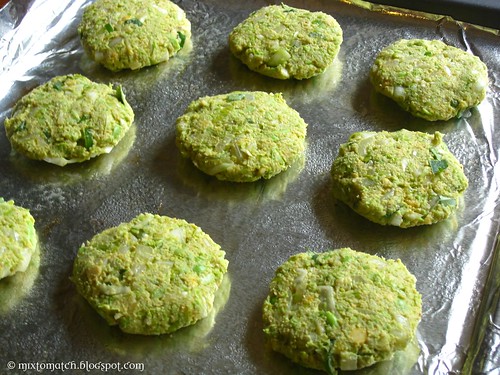
Bake at 400F till the bottom is golden brown (about 15-20 min).
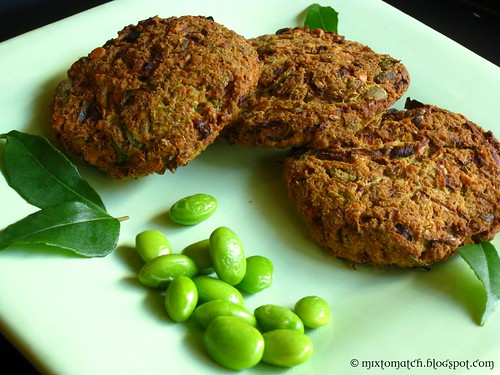
Then put your oven in broil mode and let the fritters sit for another 2-4 minutes in the oven, till you get a golden color on the top as well.
Keep a constant eye when your oven is on "Broil" mode. It will burn whatever is in your oven in a jiffy!
Take it out when it is done and enjoy warm with some chutney.
Labels:
Appetizers,
Baked Goods,
Recipes,
South Indian,
Vadai/Fritters
August 19, 2010
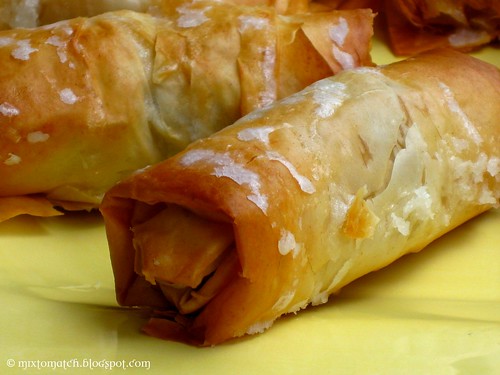
Baklava Cigars
One of the reasons I love Baklava is because it is loaded with nuts, has my favorite rose syrup all over it and uses the delicate phyllo dough!
Working with Phyllo sheets are tricky. You need to thaw them out to the right temperature so they are not too dry from the cold that they break or they are too thawed out that they stick together. One good tip is to use a damp kitchen cloth and keep the sheets covered until you are ready to work with them. Keep them covered even if it is only for a couple of seconds. That way they will stay soft and easy to work with.
It is not a pretty sight to have brittle phyllo dough all over your kitchen counter. Been there, done that!
Psst... I have even thrown the tiny broken pieces of the phyllo burying them along with the filling and rolled it all up in the hope that no one would ever find out! :)
This quick and individual portions of baklava are perfect for parties and for dunking in some sinful rich silky chocolate sauce, or caramel, or oh! oh! how about some dulce de leche?
Okay, allright! Let me stop right there because we did neither... no party, or dunking nothing in anything. We just enjoyed it way the simple way. The little sugar syrup on top was the right amount of sweetness especially if you are watching what you are eating. There is no need to let them soak in syrup like the regular Baklava. Sorry about being a little devil tempting you right there with the dunking part. Er.. remember?... We try to cook healthy here.
Baklava Cigars
Ingredients:
Phyllo sheets - 2 sheets for each cigar (buy a box, and use as many as you need)
Melted butter - 3 tbsp
Rose essence - 1/2 tsp
Dates - 1/2 cup
Roasted almonds - 1/2 cup
Roasted walnuts - 1/2 cup
Toasted Hazelnuts - 1/2 cup
Roasted Sunflower seeds - 1/4 cup
Raisins - 1/2 cup
Chocolate chips - 1/2 cup (optional)
Powdered sugar - 1/4 cup
Water - 1/2 tsp
Method:
Take out phyllo sheets from the freezer, open and cover with a damp cloth and set aside.
In a food processor pulse the nuts and seeds till they are coarse bits. Transfer onto a clean dry bowl.
Then blend the raisins and dates (chop them roughly before you put them into the food processor). Add the nuts, chocolate chips. Pulse only till combined. The whole mixture should still be coarse. You should be able to pinch out a lemon sized ball and roll it without sticking. It can definitely be on the drier side too. If it is powdery, that is okay too.
Preheat oven to 350F.
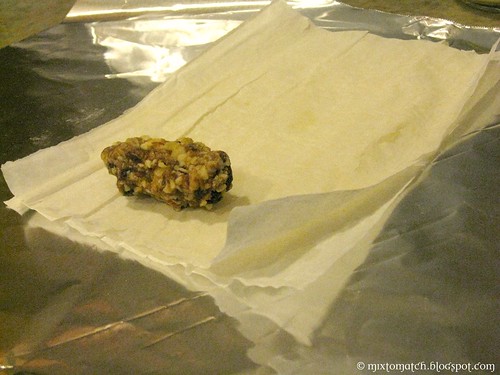
Now slowly separate out one phyllo sheet, and place on a working surface. Brush ever so slightly with melted butter and place another sheet over it and brush again with butter. Now place the filling in one corner of the sheet. Filling should be about 3" long and 1" thick.
Roll the sheet like you would a burrito. Seal the edges with a drop of melted butter.
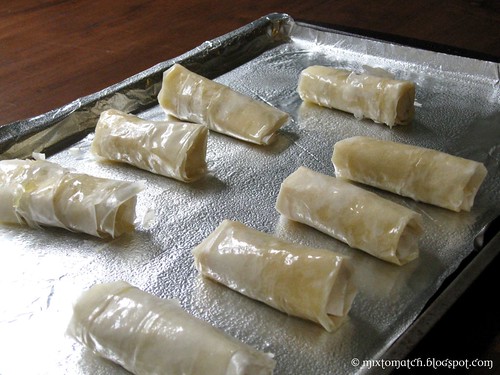
Roll all the cigars the same way until you have exhausted all the filling. Brush all the cigars with a light touch of melted butter.
Place on a greased cookie sheet and bake till the cigars are golden brown in color.
Allow to cool completely. Meanwhile mix the powdered sugar and rose essence with a 1/2 tsp of water and pour over the cooled baklava cigars. This way it is not soaking wet in sugar syrup.
Enjoy when the sugar has slightly set. Tastes even better the next day!
Happy baking! :)
Labels:
Almonds,
Baked Goods,
Chocolate,
Desserts,
Recipes
August 9, 2010
Eggless Chocolate chip Walnut cookies - Happy Birthday Amma
I am guilty of not being the first person to wish Amma today. I wish I had. I know she does not expect anything from anyone, and she probably does not even care for such days.
And she is not going to be too thrilled for announcing this day on my blog :)
I know, and yet it makes me smile.
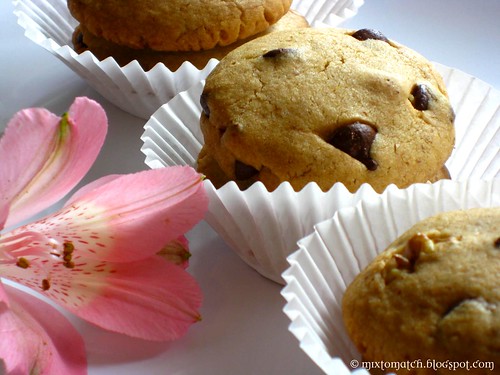
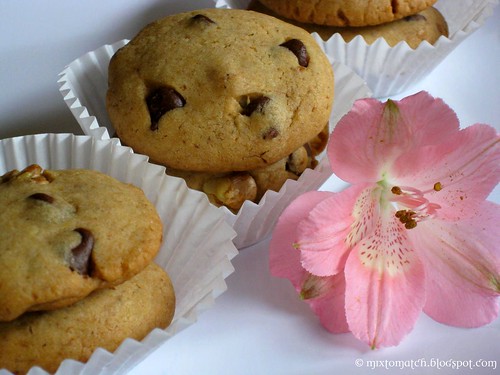
This cookie I baked today is just for her. She only has one criteria when it comes to eating what I make... it has to be completely vegetarian. No eggs, no fancy ingredients, just keeping it plain and simple. Just finished baking these, and let out a sigh of relief when she said she liked it.
Thank you for letting me make these for you today. You deserve much more than just cookies.
Happy Birthday Amma.
Chocolate chip cookies are one of the most comforting cookies that you could ever find. Making it eggless was a little challenging for I was afraid how it was going to affect the texture of the cookies. I have used flax as a substitute for egg in my breads and they have turned out nicely. So took that hint and ran with it this time. I avoided using any hearty flour like whole wheat or oat flour since I was already experimenting sans eggs.
I could not have hoped for a better tasting cookie. Loved the texture (which is crisp) and the no-fuss recipe... goes down in my book as a success.
Eggless Chocolate chip Walnut cookies
Ingredients:
All purpose flour - 1 3/4 cup
Unsalted Butter - 1 stick
Brown Sugar - 1/2 cup (I added a little less, probably close to 1/3 cup)
White Sugar - 1/2 cup (Again I added a little closer to 1/3 cup)
Pure vanilla extract - 1 tbsp
Baking soda -1/2 tsp
Flax meal - 2 tsp (mixed with enough warm water to form a paste)
Chocolate chips - 1/2 cup
Walnuts - 1/2 cup
Method:
Cream together butter and sugars until light and fluffy using a hand mixer.
Add the flax meal paste, vanilla and baking soda and beat well.
Add the flour in three parts, mixing well after each addition.
After all the ingredients are well combined, add the chocolate chips and walnuts and mix with a wooden spoon.
The dough will be pretty thick, roll it into balls and flatten them out evenly. They spread slightly, so leave 2" between them before baking.
Bake at 350F for about 12-15 min or until golden brown. Cool on a wire rack and enjoy with a tall glass of milk.
Yields: 20-24 medium size cookies
Labels:
Baked Goods,
Chocolate,
Cookies,
Desserts,
Recipes
August 2, 2010
Potato Caraway Whole Wheat Bread
I happen to love rye bread for its aroma and slightly pungent taste. Caraway seeds are usually added to Rye breads which gives this very unique taste. Caraway is related to the fennel/cumin variety and that type of flavor is not unknown to Indian cuisine. So when I was trying to come up with a recipe that used these seeds into an easy simple bread, I just couldn't wait to get baking.
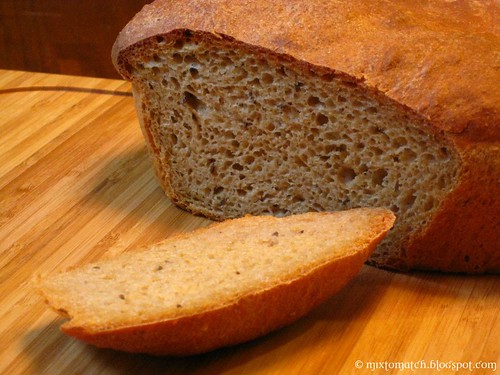
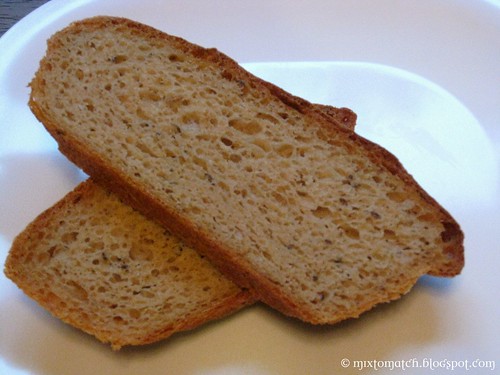
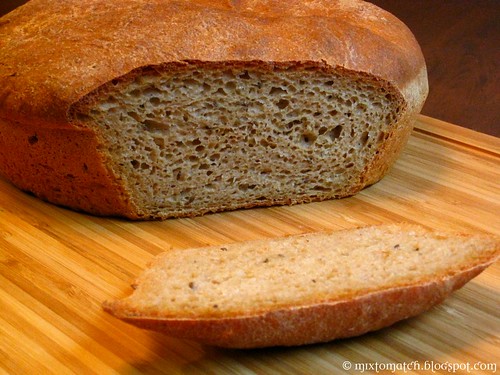
The potato gives this bread a nice softness on the inside. The crust is just beautiful and thin, and this is by far the best flavor I have had in a bread. It would blend beautifully into a panini or a simple grilled sandwich.
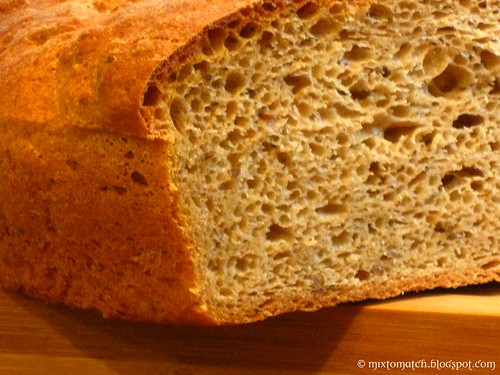
I finally got a well aerated bread. Here is a macro shot to prove what good hydration can do to your bread. Spraying the insides of the oven with water and placing a small bowl of water in the oven while the bread is baking are all methods which also help with hydration.
Bread baking by far is the most fulfilling experience in the kitchen.
Potato Caraway Whole Wheat Bread
Ingredients:
Whole wheat flour - 3 cups
Whole wheat pastry flour - 1 cup
All purpose flour - 1/2 cup
Vital gluten - 2 tbsp
Salt - To taste
Bakers yeast - 3 tsp
Warm water - 1/4 cup
Sugar - 1/2 tsp
Mashed boiled potato - 1 large
Caraway seeds - 2 tsp
Olive oil - 3 tbsp
Method:
Combine all the three flours, salt and vital gluten and set it aside.
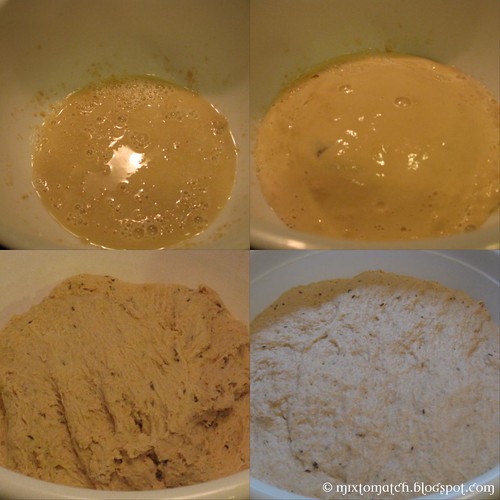
In another large bowl, take the warm water and add the sugar. To this sprinkle the yeast and let it bloom for about 10 minutes. It should start to foam up.
To this add the dry ingredients, mashed potato, caraway seeds and olive oil. Add water as needed to form into a soft dough.
Knead the dough for about 10-15 minutes by hand, lesser if you are using a kneader attachment on your stand mixer.
The dough will be pretty sticky. Do not add more flour, the dough should be very soft and supple.
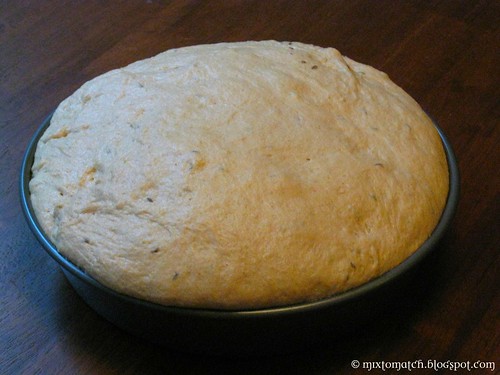
Grease a large bowl with oil, and toss the dough around allowing it to coat well in oil. Cover and set in a warm place to rise and double in size. It should take about 2 hours.
After the first rise has taken place, punch down the dough (it will be sticky and kneading again is kind of tricky, so skip handling the dough too much.)
I just shaped mine into a round, and let it rise for another hour or so. If you'd like, use two loaf pans and divided the dough equally and let it rise again.
Bake at 375F for about 60 min or the bread manages to give a hollow sound when tapped at the bottom.
Allow to rest, and slice.
Labels:
Baked Goods,
Bread,
Potatoes,
Recipes
June 30, 2010
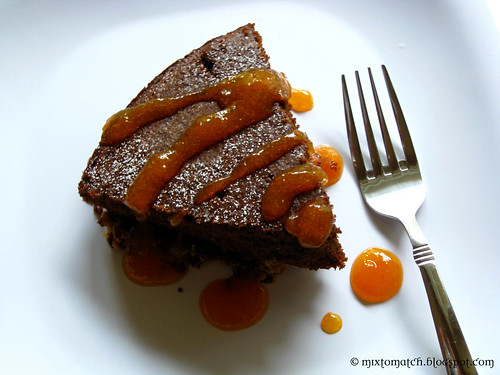
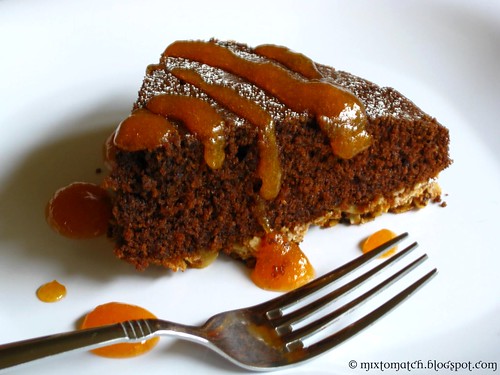
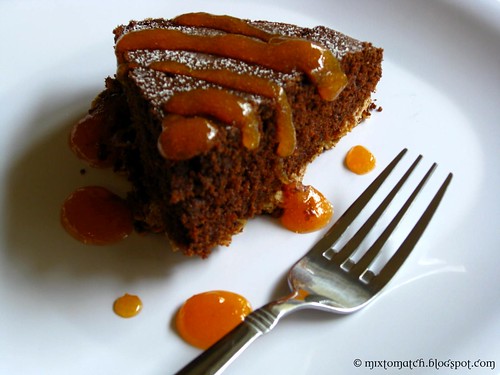
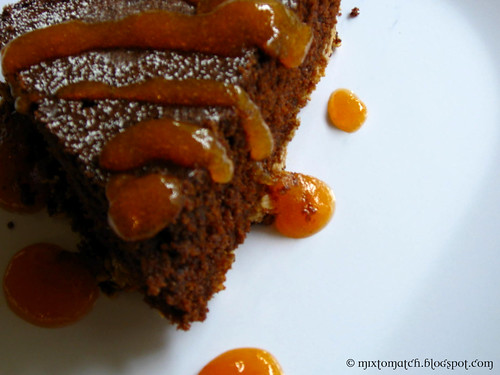
Beetroot Chocolate Cake with Rose scented Apricot Glaze
I enjoy watching people cook, there is something more intriguing about actually seeing someone cook either in person or on television, than actually reading a cookbook. The only kind of books I have or read are novels (plenty of them.)
I do not own a cookbook, and I have an attention span of probably five minutes when I scan through one. I probably stop to ogle at those luscious pictures (especially desserts)
You can imagine what goes through my mind when some well intentioned friend tells me that I should write a cookbook! The irony of it. A person who does not own a cookbook, actually writing one!
This recipe is not from a cookbook, neither is it from a cooking show. This dish was born on a lazy Saturday afternoon. No fancy story to it, we were craving for some dessert after a nice lunch, decided to make something, anything with beets in it. Threw a bunch of stuff that I thought would meld together nicely and lo and behold my beetroot chocolate cake was born.
It has some sugar and butter use in relatively minimal quantities, but there is also whole wheat, beetroot, applesauce, and oats to make it into something that you can enjoy and yet not feel super guilty about it.
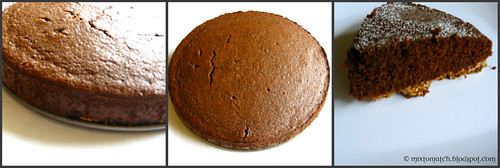
The glaze just rounded up everything beautifully. The Oat crust is completely optional. You could make the cake without it as well.
Verdict: It tasted just perfect. There is nothing I would ever change considering the whole cake lasted only that weekend. It was gone, far away to our very happy tummies.
Oats crusted Beetroot Chocolate Cake with Rose scented Apricot Glaze
Ingredients:
For the Oat crust:
Old fashioned oats - 1 cup
Light brown sugar - 4 tbsp
Milk powder - 1/2 cup
Melted butter - 3 tbsp
For the Beetroot Chocolate cake:
Whole wheat pastry flour - 3/4 cup
Finely grated raw beetroot - 3/4 cup
Original applesauce - 4 oz.
Room temperature butter - 5 tbsp
Light brown sugar - 1/2 cup
Baking powder - 1/2 tbsp
Large eggs - 3
Cocoa powder - 2 tbsp
Vanilla essence - 1 tsp
For the Glaze:
Apricot preserves - 4 tbsp
Rose essence - 3 drops
Method:
Combine all the ingredients for the oat crust and press it down onto a single even layer on a 8" greased springform cake pan.
Sift together flour, cocoa, and baking powder and set aside.
In a mixing bowl, cream together butter and brown sugar using a hand mixer.
Add the eggs and continue mixing for another 3-4 minutes until the eggs turn pale yellow in color.
Then add the applesauce, vanilla and beetroot and continue mixing. It will get a little messy, so do remember to keep the mixer on low speed.
Then add the sifted ingredients slowly into the wet batter.
Pour the batter into the cake pan already layered with the oats.
Bake at 375F till a toothpick comes out clean when inserted in the middle. Probably after 25 min.
Allow the cake to cool completely before adding the glaze.
For the glaze, mix the apricot glaze and the rose essence and spoon just before serving.
Labels:
Baked Goods,
Cakes,
Chocolate,
Desserts,
Recipes
June 11, 2010
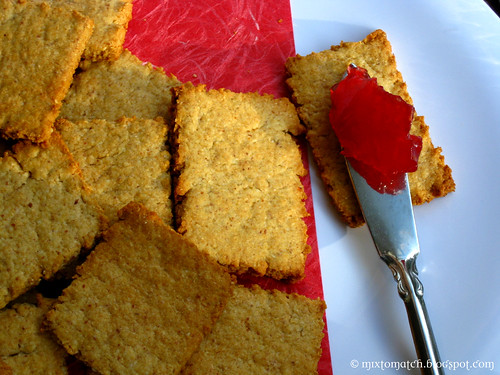
Almond and Yogurt Flatbread cookies
Last few weeks have been pretty eventful. I hardly have had time to think about cooking or blogging, I wouldn't complain or trade these days for anything else. It is all good!
So, today we have a flatbread cookie made with some yogurt, whole wheat and my favorite thing to include in cookies - Almonds. My love for the taste and texture of cookies with almonds has exponentially grown ever since I made Eggless Almond and Oats Cookie. It was/is a huge huge hit, and I now continue to make it for my friends and family. I haven't gotten a negative feedback till date. One cookie that I will never stop making!
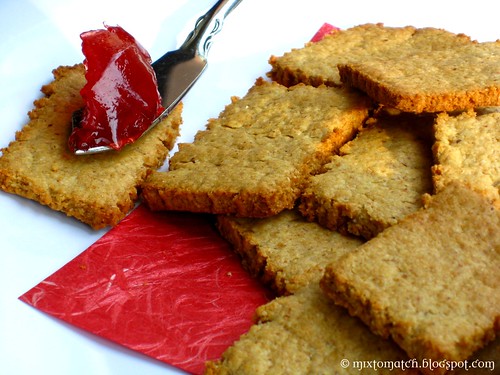
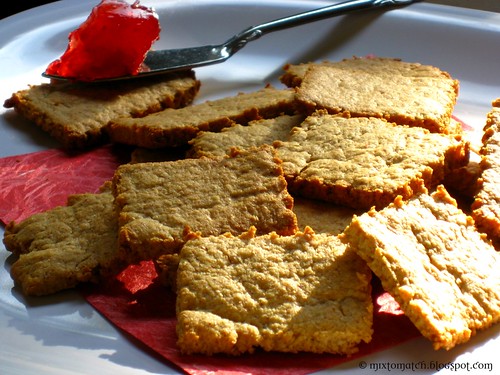
This flatbread cookie is nothing like I have ever made so far. I saw a recipe in a book which I remembered and tried to make something similar. It does not have a very strong sweet or savory taste to it, which makes it ideal for pairing with a sweet fruit preserve or maybe head along the path of some salty garlicky butter.
Considering the addict I am for anything sweet, I spread some raspberry preserves and devoured them without a second thought. Even if you are not someone who bakes cookies at home, with a few simple ingredients this is one recipe where you can't really go wrong.
One wouldn't think Almonds and yogurt are something you put into a cookie dough together. It may sound odd but it would convert you the very minute you take a bite!
Almond and Yogurt Flatbread cookies
Ingredients:
Almond Meal - 1/3 cup
Plain Yogurt - 1/3 cup (I used low fat)
Whole wheat flour - 1/2 cup
Whole wheat pastry flour - 1/2 cup
Salt - 1/2 tsp
Baking soda - 1/2 tsp
Unsalted butter - 2 tbsp
Method:
Mix room temperature butter and yogurt well.
Sift flour, salt and baking soda and add to the yogurt mixture. Add almond meal and knead for about 10-15 min.
Let it rest for 5 minutes. Then, roll it out into a thin sheet using a rolling pin, say about 1/4" thickness.
Cut into squares and lay it on a greased cookie sheet lined with parchment paper.
Bake at 400F for about 7-8 min or until lightly golden.
It will firm up a little on cooling. Serve with your choice of butter or jam.
Never tried peanut butter on it... hmmm.
Labels:
Almonds,
Appetizers,
Baked Goods,
Cookies,
Flatbread/Naan,
Recipes
May 17, 2010
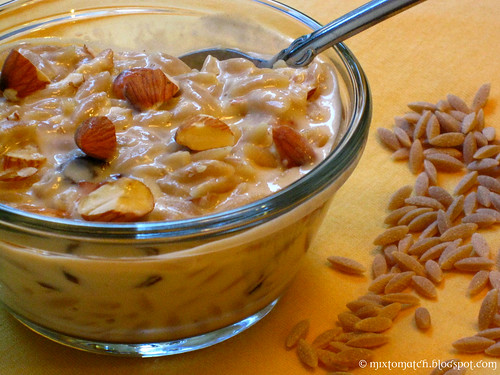
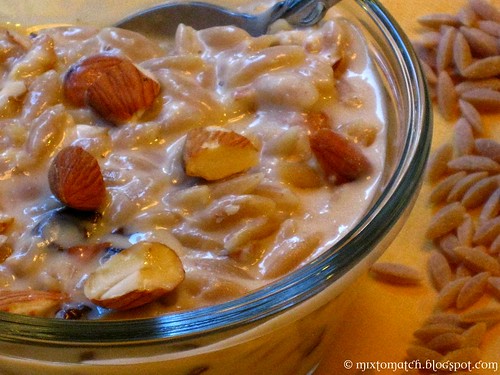
Creamy Whole Wheat Orzo Pudding
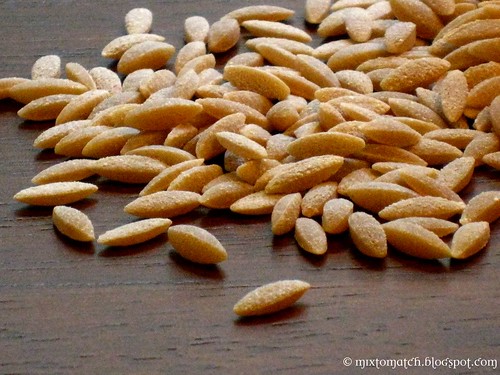
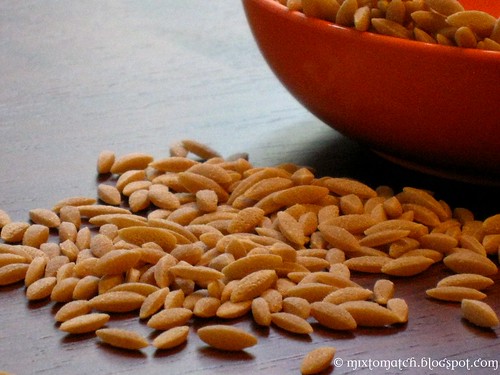
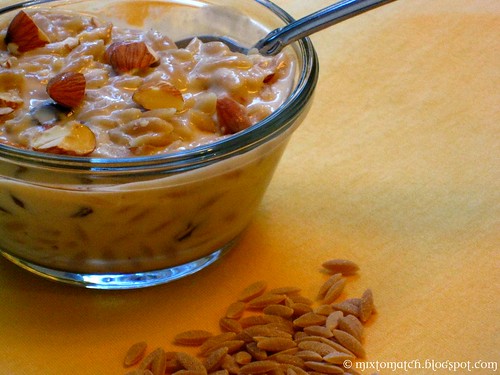
Orzo is the most cutest shaped pasta ever in my eyes. They look like rice but only they are pasta. The regular Orzo would typically look white as they are made with Durum wheat/semolina, but these that were used in my pudding are whole wheat and hence they have this brownish hue to them.
I was so thrilled to find the w.w. ones, just because I had not seen them until then or see them being used in any of the recipes I came across.
So very excited, came home, made a beautiful Orzo pasta salad with my favorite vegetables, cranberries and plenty of sunflower seeds and the rest went into making this pudding.
I love Rice pudding, especially the Indian kind. It is called Payasam or Kheer and is very similar to that of its American counterpart. Except there is no eggs in payasam.
My mom to this date makes the best payasam. I don't know what it is that she does, but turns out just right every single time. Rich, creamy... with nice crunchy cashew nuts and fat raisins that cannot get any fatter from drinking all that milk that it soaks up. I could keep on dreaming about it. My, she works such magic with desserts!
So in short, that is where my Orzo pudding inspiration comes from. You could always substitute regular Orzo if you are not a fan of the w.w. kind.
Do keep an eye out for the tempering process (I have detailed it in the recipe below.)
It is a little tricky if you add too much hot liquid into the cold eggs. Gradually heating the mixture is key, just like any other pudding.
Just a small note before we head on to the recipe... this pudding does tends to thicken as it cools.
Creamy Whole Wheat Orzo Pudding
Ingredients:
Skim milk - 2 1/2 cups
Whole wheat Orzo - 2 1/2 cups
Fat free evaporated milk - Half a can (or) 6 oz.
Brown sugar - 1/3 cup (More or less according to taste)
Organic Blue Agave - 4 tbsp (I like the taste of Agave, if you do not have it ready, you can add more of the sugar)
Egg - 1
Baking soda - A pinch
Nutmeg - 1/4 tsp grated fresh
Cinnamon - 1/4 tsp
Pure Vanilla essence - 1 tbsp
Almonds - 1/4 cup chopped/slivered
Raisins - 1/4 cup
Method:
Beat together brown sugar, agave and egg in a bowl.
Combine skim milk and evaporated milk in a non-stick pan and bring it to a boil. Add orzo and let it cook till it is closer to al dente. Do not overcook since it will continue to cook during the process. Keep stirring every now and then to avoid sticking to the bottom.
Pour a little (maybe a ladle) of the milk mixture to the egg and sugar mixture and mix well. Add a two more ladles, one at a time and gradually mix it. Then add the entire mixture back to the pot and let it simmer with a pinch of baking soda.
Very slowly heating up the egg mixture is called tempering.
If you add it all at once to the hot pot of milk, the eggs will curdle and you will get scrambled eggs. And it is totally not pretty!
Add the nutmeg, cinnamon and vanilla essence and stir well. Also add almond and raisins at this step.
The mixture will thicken as it is cooling. The pasta tends to drink up a good amount of milk.
I like mine thoroughly chilled. It tastes best that way.
April 27, 2010
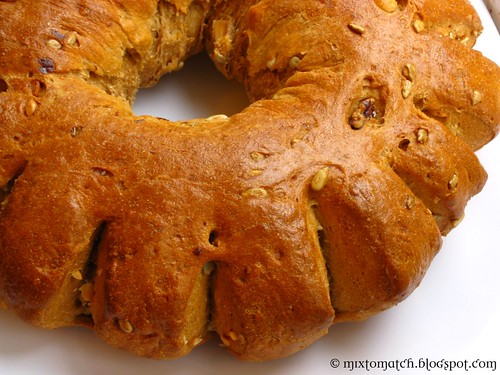
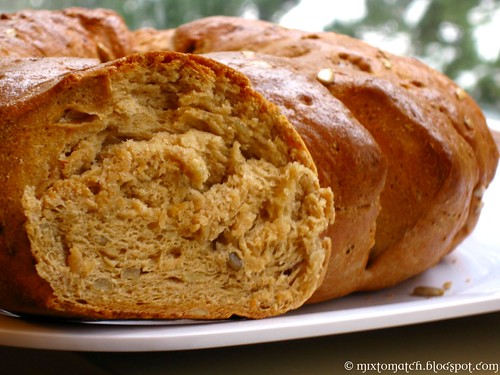
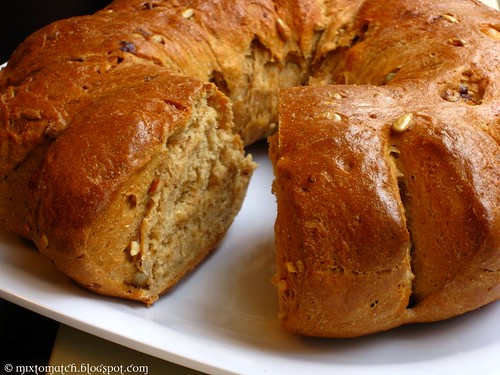
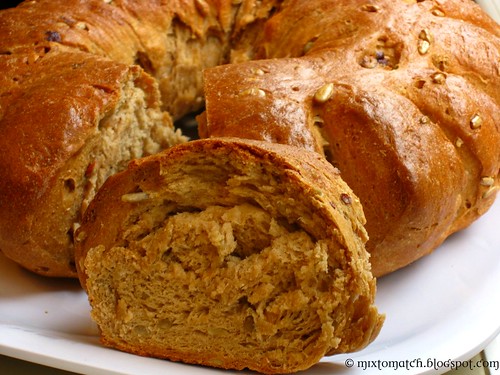
Nutty Stollen Wreath Bread (Whole wheat)
Stollen is usually a holiday bread made with dried fruits and nuts and citrus peel.
When I say "usually" you might have gotten the drift. Yes, my recipe here is not the traditional one, neither is it holiday time, nor is it sweet.
I know someone in the far corner of this world is probably shaking their head, going... why does this woman have to twist up every single traditional recipe that ever existed!
Sorry, can't help it!
I do like the sweet kind, but once in a while I do like them savory especially when I load them with nuts like this one. Oh, those delightful little mixed nuts that come in a jar! What is your favorite kind of nut in the medley? Mine is hazelnuts. Why, oh why do they put so few of them in there?
But that said, not many can keep their hands off of the salty golden brown cashews in them.
Ahem... the cashews in the jar keep disappearing magically and ever so slowly in our household! Just when there are just a few broken lone peanuts left, the vanishing act stops. If that person is reading this, then I think its time to own up!
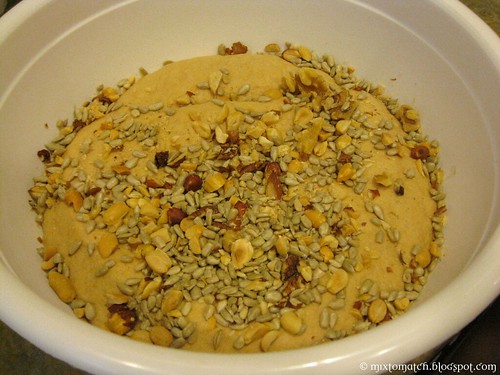
So, for this recipe I also used some roasted sunflower seeds (I always have a few of those and pumpkin seeds on hand.) Like I have mentioned in the past... Always keep nuts in the freezer (especially if you have a large quantity), this prevents the natural oils in them from turning rancid quickly. They stay fresh longer, and if you are worried that they might turn hard, not to worry...they do not freeze.
Nutty Stollen Wreath Bread (Whole wheat)
Ingredients:
Whole wheat pastry flour - 3 1/4 cup
All purpose flour - 3/4 cup
Vital Gluten - 1 tbsp
Sea Salt - To taste
Baker's yeast - 2 tsp
Warm water - 1/4 cup (to activate yeast, more for making the bread dough)
Sugar - 1/2 tsp
Roasted sunflower seeds - 1/4 cup
Salted mixed nuts - 1/3 cup (Peanuts, Cashews, Filberts, Pecans, Hazelnuts, Walnuts, Brazil nuts)
Coarse chop them if they are too large.
Egg wash - For brushing on top (One whole egg, mixed with a teaspoon of water) You will not need the entire egg.
Method:
Mix warm water, yeast and sugar and let it sit for about 10 min. The water should not be too hot or too cold. The former kills the yeast and the latter fails to activate the yeast. Yes, it is a little tricky if you are a first timer.
After the yeast starts to bloom, add the flour, vital gluten salt and form a dough by adding more water. Just enough to form a soft loose dough.
Knead for about 15 minutes by hand or use a dough hook attachment and knead till it is soft and supple.
Oil a large bowl, and let the dough sit in it covered for about a couple of hours. This is the first rise.
After it has doubled in size, add the nuts and knead just enough to distribute the nuts evenly.
Time to pre-heat the oven to 375F.
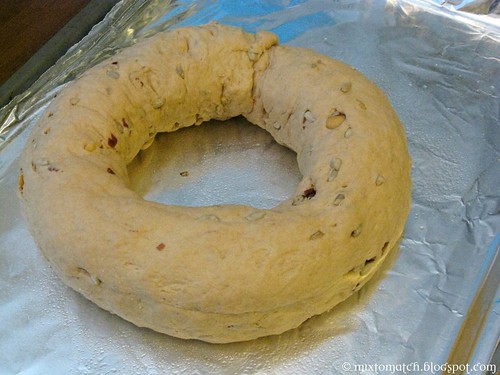
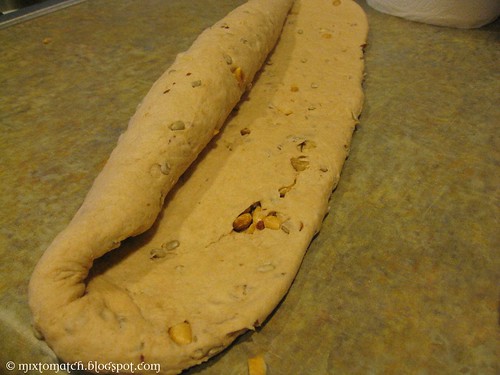
Using a rolling pin, roll out to about 1/2 inch thickness and slightly elongated as shown in picture.
Roll the dough (just like you would roll the cake for a jelly roll)
Seal both edges by inserting one into another and making into a round wreath shape. The seam will be visible.
Let it sit for about 10 minutes on a baking tray that you are going to use to bake. This is the second rise.
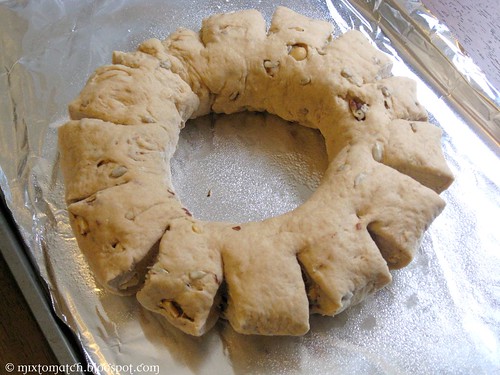
Then, using a pair of scissors cut the wreath partially (not entirely) into sections. The round shape should still be intact.
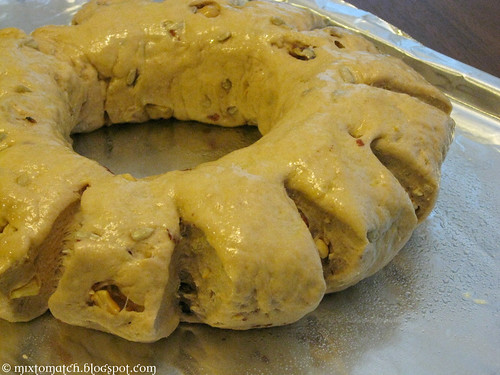
Brush lightly with a egg wash if desired.
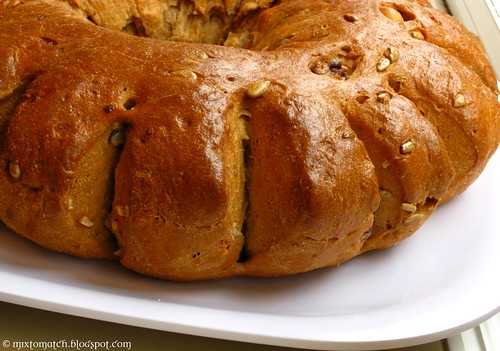
Bake at 375F for about 45-50 min till golden brown, and it should sound hollow when tapped.
Let it rest for 10 minutes. Serve with warm butter/spread. I like mine with a little dollop of jalapeno jam.
Labels:
Baked Goods,
Bread,
Recipes
April 23, 2010
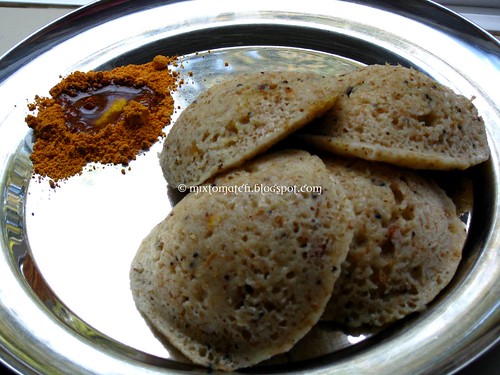
Instant Oats Idli (Savory steamed cakes) with wheat bran
I like oats, especially in this cookie form. But I am not a big fan of eating it with milk and getting it all squishy and slimy early in the morning.
I found a way to incorporate them into breakfast crepes and started making Oats dosai.
So eventually I started making Idlis with Oats as well. I somehow never got that right, maybe because I used oats in its raw form without dry roasting or whatever, and ended up with squishy idlis every time. I could not resist trying out Usha's recipe for Oats idli, I really did not think it would work, but it did! I have a few more of my recipes up for posting, but I simply had to schedule this one first... this is so good.
It is soft, spongy and totally scrumptious. I have made it twice already and this is probably the only kind of idlis I am going to be eating for a while.
I added some wheat bran to give it more airiness and make it fluffier. It worked! If you don't have it, you can totally skip it.
If you are a breakfast person like me who
-likes to eat healthy
- is tired of eating rice-based breakfast dishes
-doesn't want to go anywhere near milk and bland oats put into a bowl and eating it for the sake of eating it
-have no time to get any kind of cooking done in the morning
...then this is the recipe for you.
The idli mix can be made well ahead of time, and used whenever you need it. So you are not scrambling in the morning to get everything together.
Only caveat is... if you are not into full fledged Indian cooking, then chances are you might not have the hardware, which is the idli maker. If you have one, print out the recipe and get going!
Instant Oats Idli (Savory steamed cakes) with wheat bran
Ingredients:
Old fashioned Oats - 3 cups
Semolina flour - 1 1/2
Wheat bran - 1/2 cup (optional)
Fat free plain yogurt - 4 1/2 cups
Curry leaves - 7-8 leaves
Cilantro - 2 tbsp chopped
Broken Cashew nuts - 2 tbsp
Mustard seeds - 1 tbsp
Urad Dal - 1 tbsp
Channa dal - 1 tsp
Ginger - 1 tsp finely chopped
Dry red chillues/Fresh green chillies - 1 tbsp finely chopped
Olive oil - 1 tbsp
Baking soda - 1 tsp
Salt - To taste
Method:
Roast the old fashioned oats without oil in a pan for about 5 min on medium heat. It does tend to burn quickly if left unattended.
Cool completely and in a blender using the "pulse" mode grind it into a coarse powder and set aside.
Re-heat the same pan, add oil and when it is hot, add mustard seeds. Let it splutter.
Add urad dal, channa dal, ginger, chillies, curry leaves and cashews and roast well.
Now add the semolina on top of this and roast till it changes slightly in color (say a very light brown). Add salt and keep mixing.
Allow that to cool and transfer into a mixing bowl. Add oats powder and wheat bran.
This may be stored in an air tight container for later use. If you are using it the very same day, then add the yogurt and mix well. Add water if need be to loosen the batter a little bit. I had to do that.
Just before pouring them into idli mould, add the baking soda and mix thoroughly. Ladle the batter a little more than halfway and steam in a cooker or use a microwave idli maker.
Allow to rest for 5 minutes after steaming. Scoop out, and serve hot with chutney or chilly powder (molagai podi)
Yields 24-26 medium sized idlis.
Labels:
Recipes,
South Indian
Subscribe to:
Posts (Atom)